Google+ Bonnie Stewart | UsedEverywhere

UsedEverywhere Blog

Posts from Bonnie Stewart
http://cribchronicles.com/

Twitter: @bonstewart Life blog: http://cribchronicles.com Theory blog: http://theory.cribchronicles.com

Art in the Open: a Sneak Preview

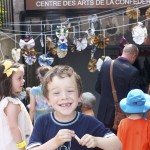
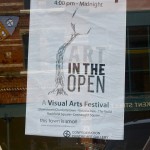
Late last summer, for a single evening, downtown Charlottetown was transformed.

There were sounds you don’t normally hear and sights you don’t normally see: poems in the street and a human crow parade and magical TV towers. Charlottetown’s first-ever festival of public art showcased not only the creativity and theatrical flair of this little city, but also its green spaces and the charm and possibility of its varied urban landscapes.

It was Art in the Open: a hands-on discovery extravaganza.

And this coming Saturday, August 25th, from 4pm to midnight, all over historic downtown Charlottetown, it’s happening again. All over Victoria Park, Rochford Square, Connaught Square, Victoria Row, and the Confederation Centre, Art in the Open will be back for an entirely new collection of magic. There will be installations, performance art, theatre, dance, portable sculpture: a whole array of new transformations waiting to make Charlottetown come alive for another evening of experiential art.

And in the middle of it – ready for you to walk right in – will be the Wonderland Labyrinth, collaborative partnership of visual artists Lori Joy Smith and Catherine Miller.

Catherine and Lori both make beautiful, whimsical things. Long-time friends, they’ve joined creative forces for the first time with the creation of Wonderland Labyrinth: a world of soft marvelous creatures and wind-blown walls. And very stylish animals.

Scaled to big and small alike, Wonderland Labyrinth is a children’s fantasy made real: an exploratory space of touchable toadstools and magic rabbits, where tiny slugs smile up at you from fabric logs and even the rocks are adorably cute.

Large and small, EVERYthing is cute.

I got to visit the inhabitants of Wonderland Labyrinth and their creators and talk a little about Art in the Open and their inspiration for this year’s installation. Lori was busy wrapping a barbamama with genuine Island wool blanket ends from MacAusland’s Woolen Mills, while Catherine fixed a fluffy tail to a nattily dressed bunny.

1. Lori, how did you get involved in Art in the Open?

Catherine approached me with her idea of a labyrinth back in the spring. She wanted to build a large 60′ by 60′ fabric labyrinth filled with creatures and animals. I loved her idea and was really excited about the thought of a collaboration with her. Catherine’s work tends to be big and bold, where I like to work small and intimate. It’s been a great experience trying to blend the two. I feel we’ve done a great job.

2. You have indeed…all the critters are full of personality. What’s your most vivid memory of last year’s Art in the Open?

I think the bonfires in Victoria Park are my most vivid memory from last year. It’s hard to say tho, because it was such a magical night. It felt like everywhere you looked there was art and people. There were people riding story telling bikes, the crow parade, DIY t-shirt in the park… the cannons wrapped in blankets. It was great to see Charlottetown so alive.

3. What inspired you and Catherine to create your particular installation for this year’s show?

Catherine came up with the main idea, but it has grown and developed as we’ve worked on it together these past couple of months. We wanted to make it a Wonderland for kids. We’ve drawn inspiration from the books we loved as kids to create some of the characters, Beatrix Potter books, Wind in the Willows, Moomin books by Jove Hansen and the barbapapas, to name a few. It’s been fun working together on this and truly a collaboration. We worked on each piece together. Catherine did most of the sewing and I knit most of my pieces. We took turns sewing the almost 100 fabric panels though… that’s seriously a lot of fabric!

And it’s seriously a grand collaboration.

Even the garlic is cute.

Come on out, Charlottetown, on Saturday August 25th, and enjoy the magic of Wonderland Labyrinth and all of Art in the Open. Help the city – and this fabulous installation – come alive.

Creating Artists in the Cradle of Confederation

One of the coolest things about Charlottetown PEI is the punch it packs, arts & culture-wise, for its size. It only has 35,000 people, give or take a few. But as a provincial capital, it’s a rich hub of music and theatre and art and learning at a level few small cities can match.

And in the literal midst of it all, on one of the key corners of historic downtown Charlottetown, is the Confederation Centre.

Built in 1964 to commemorate the meeting of the Fathers of Confederation next door at Province House, Confed Centre is a high modernist concrete ode to public space and Canadian culture. Outside, its unique architectural imprint dominates the downtown landscape and encourages on-foot discovery, as its concrete grounds host a multitude of creative and inviting spaces for humans. Inside, it houses the largest mainstage theatre in Canada east of Montreal, the city library, a chic restaurant, a variety of studios and a two-story art gallery.

Underneath it all, though, in the “art bunker” more formally known as The Schurman Family Studio, is the space that perhaps matters the most, in terms of fostering Charlottetown’s arts & culture identity.

That’s where the art camps take place.

Artisanal skills and spirit are the heart of any arts & culture community, and the Confed Centre’s art camps give children the opportunity to build those skills and spirit, hands-on, in the midst of Confed Centre’s thriving summer scene.

Run by art educator Gail Hodder, the summertime camps are a week long. The kids try different media, sketch Province House, do amazing chalk art on the concrete expanses outside, check out the art gallery AND spend  lunch hours in the ampitheatre enjoying free musical theatre by Confederation Centre’s Young Company. It’s like a cultural bonus tacked onto the arts curriculum: by the end of the week, my kid knew all the words to Gordon Lightfoot’s Canadian Railroad Trilogy!

At the close of each weekly camp, the young artists proudly host an art show.

They showcase their comic strip creations, replete with real genuine Confederation Centre gallery namecards for mama to frame.

They showcase their tie-dyes.

They showcase their sculptures.

They showcase their collaborative enterprise: a tiny town, replete with foliage, built out of their own individual imaginative buildings. Oscar’s was a hotel-hospital, he told me.

It was totally steampunk.

All the parents ooh and aah and take lots of pictures…

And then we emerge from the art bunker, all loaded down with papier mache, to where the children’s hand-made fans blow in the wind with Province House as a backdrop.

What more could you want to foster artists of tomorrow?

Village Pottery: the Potter's Daughter brings PEI to the world

For young women in this day and age, the words “follow in your mother’s footsteps!” aren’t often framed as the path to success.

For Suzanne Scott of Village Pottery in New London, PEI, however, her mother’s footsteps have proven to hold plenty of scope.

Suzanne’s mother, Daphne Large, opened Village Pottery in 1973. Aptly named, the shop is set against the pastoral backdrop of L.M. Montgomery’s birthplace, and in its almost-forty years in operation has become something of a PEI artisanal haven. Daphne has trained a host of other PEI potters, and showcases many of their products in the shop. Her daughter grew up working in the shop, and after returning to PEI to live three years ago, Suzanne took up pottery professionally and became a partner in the family business. And, tweeting as Potter Daughter, Suzanne has brought that family business to a whole new global market via web sales and social media.

Walking into Village Pottery feels like walking into a charming antique general store, except the quaint corners and tall shelves are singularly stacked with the warm shocks of colour and elegant lines that mark their pottery. Cranberry and midnight glazes, delicate signature lupins, and the red mud of PEI capped by the steel-sky-blue of their Celtic Shore collection all greet the eye.

It’s the little details that make the shop such a welcoming space: the tea wagon at the front door, the vintage spools of wrapping paper, the spinning wheel upstairs in the gallery.

And at the back, her hands in the clay, making mugs spin up out of nothing, is Suzanne.

1. Suzanne, what drew you into the family business? 

After living abroad for a few years, I returned to PEI and saw an opportunity to grow the family business by marketing online. I started by creating a new website, online shop as well as starting a Facebook page and Twitter account. We have had great success and as a result, we’ve shipped our pottery worldwide and have been able to connect with our customers on a whole new level.

2. How has Village Pottery changed and evolved over the years? 

Over the last 40 years, Village Pottery has evolved in every aspect. My Mother started the business in 1973, since then the building has been picked up and moved down the road and a full studio was built on the lower level. There has been all kinds of items sold in the shop over the years by many local artists. From leather wallets made by my Dad to wood carvings by Sandy Stratton, the shop has seen it all. At one point, we even had an ice cream booth set up in the shop!Our main focus now has become pottery. We feature work from over 10 island potters and the majority of our work is done in the studio. Visitors are welcome to watch us in action. The second level of the shop is a gallery featuring fabric art by Margaret England, paintings by Geraldine Ysselstein and Katharine Dagg as well as handwoven scarves by Rilla Marshall.

Next year we celebrate our 40th season which will be a great occasion. I’m certain that Village Pottery will continue to evolve over the next 40 years!

3. Do you pot? In what ways does the PEI environment (human or natural) shape and inspire (or limit!) your work?

I have been making pottery for just over a year now and loving every minute. I started out over 10 years creating the pottery jewellery line “The Potter’s Daughter” and still enjoy that aspect but felt the need for “more”, so started throwing on the wheel and haven’t stopped since. I am constantly inspired by the beautiful landscape of PEI, from the rolling farm hills behind Village Pottery to the red sandy beaches. It is definitely evident in our shop as you will find, there are PEI inspired pieces all over the place! We have even created a glaze combination based on the beach titled “Celtic Shore”.

4. What’s the most interesting sale or connection you’ve made by bringing Village Pottery online? 

There have been so many it’s hard to choose but I have to say our most interesting connection came from Barbara on Twitter. We received an online order from her for some pottery and when asked where she had heard about us, she said it all started with Great Big Sea. She had heard one of their songs, googled it and learned that the lead singer Allan Doyle was starring on the show “Republic of Doyle” filmed in St. John’s. That led her to Sea and be Scene, an online site promoting all things in Atlantic Canada. Stephanie from Sea and be Scene has been a great promoter of our pottery shop and voila! Barbara discovered our shop all the way from Ohio. She remains one of our most loyal online customers.

Suzanne & Laura at the desk

5. Tell me about the differences between your work and your mom’s.

My Mom has been making pottery for almost 40 years so obviously, she is the master potter in this team! I think the main difference between our work is that I like to try new trendy things like the “Mustache Mugs” and “Struck by an Arrow” Stir-fry bowls. I also like experimenting with new textures, this led me to create a line of lace imprinted plates, trays and vases. These are made using my grandmother’s lace which is a nice touch. In the end, my Mom is the one who has taught me everything so I’m certain there are more similarities than differences between us, which isn’t such a bad thing after all.

Now, taking a three-year-old along on a profile of a shop in which everything is breakable may not generally be best practice, but Josephine was mesmerized by Suzanne throwing pots, and even more entertained by the designated kid zone under the stairs. Suzanne and Laura – the potters on site the day we visited – also gave her some clay to try. She’s ruined for PlayDoh forever.

So if you’re anywhere near PEI, and you fancy a pretty drive along our scenic North shore, stop in at Village Pottery and say hello to Suzanne and Daphne and Laura and everyone else and enjoy one of the Island’s artisanal treasures! And hey, you have to go in just for the pleasure of smiling at the inside of this old-school front door. You may leave richer in mugs, as I did, or in pottery lessons, or simply in charm. But you’ll leave glad you came.

A Teacher's Guide to Successful Summer Learning Projects

Welcome to the first weekend of summer vacation, at least out here on the East Coast.

If you’re my just-graduated-from-kindergartener, there’s relaxing to be done, neglected toys to be dug out of the corners of the basement, and a backyard to be re-envisioned as a Star Wars set. Plus the splash pool! And the park! And day camps for swimming and art lessons!

It’s all good, and all fun, especially when the weather holds.

But we’re lucky to have a few stretches this summer where the kids and I will be home together. And while we all look forward to unstructured days (or respites from schedules and lunch-packing), I’ve noticed they aren’t always all they’re cracked up to be. Time at home with nothing we have to do can morph quickly into time at home with nothing to do, at least in the eyes of my kids.

Especially if it rains. And hey, it’s the Maritimes: it rains.

Now, I want to encourage my kids to be independent. Even when they’re home, there’s work to be done – both my writing and our family domestic stuff. Days off together involve stretches of complicated Lego games involving aliens and Hello Kitty, but they also involve stripping beds and folding laundry and whatever other chores I can get the kids engaged in. Pro tip: you can get a juvenile Star Wars fan to wipe down a lot of windows if you relabel your Windex “The Force” and tell him the fingerprints represent the Empire.

Still. As the kids get older, they just don’t buy the whole “field trip to the grocery store!” game so easily anymore.

And I still have writing deadlines that require quiet headspace.

So I’m dragging out my long-unused teacher hat – yep, I was once entrusted with the care of whole classrooms of children all at once! – and we’re designing us some summer learning projects that should offer me and the kids both togetherness and independence. They’ll learn. We’ll have some fun. And hopefully, somewhere in there, they’ll get engaged enough in their stuff that mine can get done too.

Win-win.

So. If you’re home with kids this summer, a few tips for designing successful summer projects that can actually be fun for the people involved, short and tall.

First, a definition: a project at its most basic is a learning experience that takes place over time and has a few clear steps that lead toward an end goal.

A project is not – at least if your kids are relatively young – a matter of simply dumping a whole bunch of art supplies or resources on a child and saying, “Go do…SOMETHING!” That’s called a diversion. Diversions usually last all of fifteen minutes and result in half an hour of cleaning-related mess.

With a project, the parents’ role is keeping the steps clear and the goal in sight, while scaffolding opportunities for the kid to take on tasks and responsibilities that lead toward that goal.

Here’s what you need to think about to design a fun family project for summer:

Find Roles for Everybody, Including You
Projects need to be at least a little bit collaborative. Nobody, no matter their age, enjoys being sent away on busy work. If you’re all actually engaged in your respective pieces of the whole, the experience will be far more fun for everyone.

Emphasize Shared Interests
Any project that’s going to be enjoyable has to be interesting to the people actually involved. So if your kid loves bugs but you, say, DON’T…you may want to either pick another project or design it in such a way that you’re not dreading and avoiding your involvement. Try coming up with a list of things you both find interesting, and then think laterally: where do your imaginations take you?

I grew up in apartments, and was well into my thirties before I realized cucumbers are not a root vegetable. So learning about gardening and growing food and flowers is a project the kids and I can embark on together: we have a giant box of tomato plants growing on our back deck. But the questions and games and projects that emerge from that box of tomatoes will be up to the kids: so far, we have a science “how things grow” research project, a cookbook plan, a tomato art show, and a contest to see whose pet plant grows biggest all coming down the pipe.

Keep it Focused
A fun project doesn’t need to be complicated. In fact, complicated won’t work. Keep your end goals clear and the steps to getting there within the realm of your own skills (and your child’s!) and the available time you’re able to contribute.

Scale Appropriately
Three or four (sometimes repeated) steps in a project are usually as much complexity as a kid can handle, and a couple of weeks is usually the maximum time span a child can sustain focus on an ephemeral goal. If you’re home all summer, don’t plan a whole-season project, but a series of smaller targets. They can be interconnected if you like, but assess what works and doesn’t from the first before leaping on into the second.

Also, scale participation for kids’ ages and skill levels. From our family tomato project, my six-year-old wants to create tomato recipes and a cookbook from our bounty. For him, this is probably do-able. For his three-and-a-half year-old sister, just being part of the watering and weeding process and drawing pictures of herself as a tomato-grower should suffice. Or building Play-doh gardens.

Have an Audience in Mind
Kids are people: they like their work to be received and admired just as much as you do. One of the things teaching taught me was that real audiences matter. Whether that’s writing books for Grandma or blogging, podcasting, or sharing photos with the world, real-life audiences are motivators for kids. When our son was head-over-heels over dinosaurs and talking about them 24-7, his dad decided to harness some of that knowledge and interest, and the Charlottetownosaurus podcast was born. Now that triceratops have been replaced by Han Solo in the pantheon of fascination, we may try a CharlottetownoStarWars podcast instead.

And the beauty of Internet projects? You don’t end up with boxes of them stored in the basement.

Don’t Take Over 
Projects should create interactions in which both kids and adults get to feel like they’re doing something valuable: don’t take all the learning and control out your kids’ hands. No, really. If you think ahead in any project, you’ll see potential risks and mistakes on the path. As a parent, sure, you need to minimize the ones that actually involve danger or hours of cleanup. But leave the rest. Let your child have the chance to learn from his or her own choices, even if that means that sometimes your project doesn’t quite turn out as planned.

Who knows? You might even – gasp – find your kids working together!

Project-based learning is centered around one key premise: the project? Is actually secondary to the process. That’s where the learning happens, and the memories, and the confidence-building. And the fun.

Enjoy your projects!

The Pretty Little Man-Dress, for Dad

Father’s Day in 2012: the pressure. The stress! The onslaught of vaguely embarrassing and stereotypical TV commercials! The slew of cards with BBQs on them!

Like any holiday that becomes a commercial juggernaut, contemporary Father’s Day suffers from a case of performance anxiety, and it foists its burden on everybody in its path. Have a father? A partner who IS a father? A grandfather? An uncle? A pet who loves the man in your life dearly?

You’re obliged.

The Hallmark machine that is contemporary Father’s Day exhorts everybody in the immediate vicinity of modern-day fatherhood to cough up time and money to ensure that Dad feels deeply cared for and attended to on his special day.

Now, this can be a really good thing. Dads are important, and men today are playing new nurturing roles that will likely have huge and positive impacts on the lives of their children. No longer is Dad just a pipe and slippers fixture on the armchair of our sociocultural family imagination.

But. We’re doing a crappy job of celebrating him properly, people. We’ve swapped out the old stereotypes only to replace them with new ones. You may feel obliged to make Dad’s dreams come true on Father’s Day…but what kind of dreams does Father’s Day merchandising actually sell?

Judging by the card selection at my local stationery shop, apparently all Dads live for the following:

1. new golf clubs
2. a personalized set of BBQ tongs
3. beer
4. fart jokes

Now, I enjoy a good fart joke as much as the next person (well, not if the next person is my six-year-old, but still) and beer never goes out of season. But seriously, world. A man can only use so many sets of golf clubs and steak implements, and all that golfing and standing out on the deck grilling and farting and drinking kinda perpetuates the old “Dad is the fun parent when he’s here but really, he’s secondary on the domestic front and relegated to the deck” mythology.

Truth is, the deck is fun. I’ll happily stand out there and BBQ, at least when it’s not January. But to get past the slightly snide ways in which we celebrate Dad as parent and caregiver and truly honour him as a well-rounded person and not a Homer Simpson caricature, we need to bring BACK the standard Father’s Day gift of yore.

The tie.

Yep. Let’s be clear: the necktie, with its straight, stuffy reputation? Is actually the most subversive, saucy gift you can give a man for Father’s Day. Why?

Because ties are – looks around, whispers – actually pretty little man dresses.

Seriously.

Back in the Renaissance and European Restoration era, dudes got to wear velvet and lace and fancy little hose with those pointy shoes at the end. They practically pranced around in drag, swathed in sumptuous fabric. And ribbons!

Manly: Old School Version (photo credit: Photo Pin)

It can’t be easy being a man in this day and age. There’s nothing sumptuous about most men’s clothing choices. Avenues for self-expression – and velvet! – are limited. Hair is short. Hose are a niche market. You can’t wear band tshirts forever and get promoted.

So what happens? Men in the Dad phases of their lives end up falling in line and standing on the back deck in bland golf clothes drinking beer and wondering why everybody swoons over Mad Men and not over them.

The answer is simple: not enough ties.

Ties, ladies and gentlemen, are glorious. They’re expressive and varied and rich in texture and colour and pattern. Pretty little man-dresses, I tell you.

Better, every single man – and plenty of women, hello Annie Lennox – looks absolutely smashing in them. They exude vintage style and power, a la Mad Men (purr), and they inject a little bit of joie de vivre and jauntiness into the otherwise drab landscape of men’s fashion.

Look at these beauties! Elegance, in socially-sanctioned man-form.

Worn right, ties are hot. It’s that simple. They get noticed, and they reap compliments, and they make a man feel kinda purdy like a player. Whatever floats his boat. Ties are the one place men get to be playful and still professional in their wardrobe choices.

So for Father’s Day, do the Dad in your life a favour and help him out of the beer & BBQ box and beyond: buy him a tie. Or three.

Maybe he’ll like feeling pretty. ;)

(photo credit: lisby1 via photo pin cc)

The Gift of Life: It's In You to Give

There is a tiny red heart in the bottom right corner of my drivers’ license: it has been there for years.

It communicates – in the event that I am unable to communicate for myself – that I wish to be an organ donor.

“Wish” may be the wrong word. Like most things related to the possibility of my untimely demise, it isn’t something I wish for at all, nor something I especially want to think about.

Still. I make sure the red heart is on each consecutive license issued to me, and I make sure my family know that it is there. Because should the circumstances arise that there are no more wishes to be made on behalf of my mortal self, then the last wish I’d have for this body that gets me through my days is that it be, if at all possible, some help to others, some means to offering them more days.

But did you know you can be an organ donor without any unhappy endings for anyone in the process?

I didn’t know much about living donors until this week, when the issue – and the urgency – of organ donation hit home within the UsedEverywhere family.

Harrison Aikman is six seven* years old. Brodie, social media producer for UsedRegina, is his dad. His aunt Jennifer is with the UsedEverywhere national office. Harry’s been on the UsedBlog before, out for a walk with his big brother.

But Harrison isn’t out for a walk these days. He’s in acute liver failure.

Jennifer flew to Edmonton this week to see if she could donate part of her liver to give Harrison a fighting chance at recovery and health. Turned out, she wasn’t a match. But Harrison’s mom is.

It’s major surgery, and there are risks for both parties. It’s got to be a week of huge emotions all round in the Aikman family.

But like Jenn said in an email, “He’s six seven* years old. He deserves a shot.”

Anyone interested in giving the Aikman family a helping hand through this time can click here to access the fundrazr page above.

We’re all pulling for Harrison here at UsedEverywhere. We’re relieved and hopeful that it looks like his mom will be able to offer this incredible gift; crossing our fingers – and all our organs – that both of them will recover swiftly and safely.

We’ll keep you updated on their story through our various community Twitter feeds throughout the country as things unfold.

And…because organ donation can be a bit of a roller coaster ride, no matter how good a match looks: if anyone in the Edmonton area has blood type O+ and is interested in being tested as a potential back-up match for this beautiful little boy, please email toni.chow@albertahealthservices.ca. And thank you.

I’ve learned this week that there are more than 4000 Canadians waiting for transplants of all kinds: live donation of kidneys and of partial livers and lungs is now, amazingly, possible.

So that little red heart or red dot on your license? It matters. But it’s not the only way to give the gift of life to somebody like Harrison.

Please join us in getting the word out, for Harrison and the Aikmans, and for all the other people and their families out there in need of the biggest gift there is: a shot at life, at heading out for another walk.

*edited*: apparently Harrison is seven. Or has just turned seven. Hey, my aunts are always off by a year with MY age, too. ;)


Seven Tips for Getting Sold Fast: Make Your Used Item Stand Out in the Crowd

It’s spring, and I have clutter.

You know what that means: time to sort, organize, and list! UsedPEI, I have the motherlode coming your way.

The great thing about sell & swap sites and services – whatever your local and preferred flavour may be – is that they enable you to minimize the clutter in your living space while also making money. One person’s trash is another’s treasure, so the saying goes.

But the truth is, if you’re really trying to sell trash – or if you treat your potential treasures like trash in your listings – you may be selling yourself short.

Listing items on a used site is easy. It really is. However, you can drastically improve your chances of selling by taking just a few minutes to actually show your treasures off properly.

Below, friends, my hard-won wisdom from months trolling the boards. Here’s how to maximize what you sell in the minimum of time: seven tips for making the selling used process as efficient and successful as it possibly can be.

1. Sell quality
Decide what you actually want money for, and what you simply want to get out of your house.

The fact that something may no longer be of use to you doesn’t make it garbage: UsedPEI and the UsedEverywhere family of sites pride ourselves on helping keep things out of the landfill. But, that said, the profit margin on many things is rather tiny, and the lower the value of the item, the more intense the haggling. If you simply want to get rid of something quickly, but aren’t sure whether it actually has monetary value, consider listing it under our Free headings: stuff tends to disappear faster there.

Or if something’s in decent shape and you’re able to afford to simply give it away, consider donating small items to places where they’ll be appreciated.

2. Know your market
Once you’ve sorted out what you want to sell, take a few minutes to consider what it might be worth, and to whom.

Is this a niche item? The older something is, or the more unusual, the more likely you are to have a real treasure on your hands, in the eyes of somebody. If that’s the case, make sure you target your ad with relevant key words.

If you’re selling Aunt Edna’s ancient lamp, take two minutes to do a google search for what era the lamp belonged to. Then title your ad appropriately. Many buyers search the site by keyword, not by simply scrolling through everything available.

3. Know your value 
While you’re checking out what era Aunt Edna’s lamp came from, take an extra minute to see what they currently cost and whether or not there are any already on the site. Consider the shape yours is in, and price accordingly.

Pick a price: don’t take the easy way out of “best offer” or $12345. If you want to sell, looking like you know the value of what you’re offering is a surprisingly big part of making people want to pay it.

That said, be reasonable rather than aspirational if you want to sell fast. If you hold out for absolute top dollar, you may be holding out for a long time. And if you’re firm on your price and not at all open to dickering back and forth, say so in the ad.

4. Be descriptive
While nobody’s going to win a Pulitzer for their used ad, being moderately interesting does help to engage potential buyers. Use clear descriptive terms to market your item, and market it: make it evident what it’s for and why someone would want it.

“It’s spring: need a good, gently-used, rust-free kids’ bike? Orange 20 inch, $50″ targets readers’ attention both to your item and to why your item might be useful to them in a way that “Bike for sale” does not. It often doesn’t take a whole lot of description to distinguish yourself from the competition: a mere modicum of effort can make all the difference.

5. Take DECENT photos
Again, you don’t need to be a professional to stand out from the crowd in this department. But it’s probably the one that makes the biggest difference to overall sales.

The Internet is a visual medium. People scan sites by keyword, but they click on what they can see. Include photos. Even if what you’re selling is as ugly as the day is long, let the world see the ugliness with its own eyes. Don’t surprise buyers at your door.

Top tips: Include a few photos from a few angles. Take the thirty seconds necessary to wipe the dust off the piano, for instance, and remove the thirty-three family pictures cluttering all the attractive woodworking details on the damn thing. Better, especially if you have outdoor items to sell, pick a sunny late afternoon and photograph them all. I squandered all of last week’s sunshine and am now stuck trying to get decent pictures of children’s play items in the pouring rain. Boo.

This is my pizza oven. It’s a great, flat toaster oven, about three years old. Unfortunately, since we moved, we no longer have space on top of our fridge for it. We also stopped eating a lot of pizza, hence…time to sell.

I dusted it. Nobody wants to buy a dirty-looking kitchen appliance.

I put it in a place in my kitchen where it would be well lit. I wiped the surface it was sitting on. And I opened the door for one of the shots: it’s important to show potential buyers what a piece can do.

I also removed most of the extraneous kitchen junk from the frame. I am not selling my kitchen: I am selling the pizza oven. You will notice that all sales-oriented photography is minimalist: it focuses attention on the item.

This all took approximately 45 seconds. Hey, I’m asking $30 for the thing. $30 for 45 seconds extra work? Good deal, IMO.

Last photo tip: PLEASE, people. PLEASE. Rotate your photos before uploading them. Don’t make me hurt my neck craning to see if yours is the piano – or the pizza oven – for me.

6. Spellcheck
I saw an ad for a clock the other day. Unfortunately, it wasn’t spelled that way. Some buyer is going to be VERY disappointed.

7. Be honest
Chances are what you’re selling will be useful and desirable to somebody. But don’t oversell, and never NEVER make overt claims that aren’t true. Mutton dressed as lamb doesn’t smell so good when the buyer is holding it in his or her hands, and – especially in small communities – your reputation as an honest seller will go far further in the long run than the extra $10 you might think you’ll get right now by pretending Aunt Edna’s lamp actually works. If you’re selling something for parts, say so.

In the end, selling used can be a great way to both keep your living space under control and make some extra cash. But like any thing that pays, the rewards tend to equal the effort expended. If you put the absolute minimum into your listings, you’ll likely get the absolute minimum out. If you have decent things to sell, take ten whole minutes and list them right: you may see up to hundreds of dollars in speedy return. That’s profit worth working for, I think.

A DIY Woodshop: The Six Tools You Need

The Scene: our house. A weekend.

I turn to Dave and say, apropos of nothing much said, “I think I should write a post about tools: about how to choose the key tools you need to be able to build furniture. The Top Five Tools! I mean, we’re trying to get the shed set up so we can build the furniture we want…lots of other people would probably like to be able to do that too!”

To Dave’s credit, he really only sputters a little. Then one eyebrow raises, archly.

We’re doing it?”

Ahem.

Fair enough. I, for the record, use a hammer real good. Except when I hit my thumb. I can also use a drill without causing anyone imminent danger. Beyond that, I really don’t know a table saw from a jigsaw and have a healthy fear of both.

If we were really reliant on my furniture-building skills to finish decking out this half-empty house, we’d be sitting on milkcrates well into retirement.

I don’t want to sit on milkcrates. I want to sit on these kinda babies and their Frank Lloyd Wright-designed brethren.

Photo courtesy of http://www.flickr.com/photos/designministry/83699766/

So I try again. In the interest of not taking false ownership of tools, skills, research, or sourcing my hands have actually had no part in, I hand the entire laptop over to Dave.

“Fearless Home Furniture Maker,” I said, “What are the Top Five Tools a person needs to get started in his or her own woodshop?”

End Scene.

(Note: in the wisdom handed back, there are six Top Five tools. Somebody doesn’t like having structure imposed on him anymore than he likes my misuse of the word “we.” ;)

*The Top Five Six Tools You Need for an Effective Home Woodshop*
- by Dave Cormier, NOT Bonnie Stewart

I’m not what you would call a carpenter. That is, unless you have a very broad minded feeling about the word. I do like to build things in wood, and have been working my way up to furniture by doing a few new projects every year for the last few. My dad gave me a hand-me-down mitre saw five years ago, when he bought himself a new one. I started with a picture frame, and built some steps for our old house.

Then a playhouse, for our kids. Still practical stuff, mostly. Built of particleboard, fir, and cedar, without a lot of fancy detailing.

When we started talking about moving into the new house, though, I had certain feelings about the furniture that would go into it. I wanted it to be furnished with things that were solid, that would last, that wouldn’t get thrown in the dump five years from now and replaced by other things equally flimsy and disposable.

Bon found this chair on UsedPEI a few weeks back: while not exactly what I’m hoping to make, it sort of exemplifies what I’m going for. Here it is, long after its maker probably ever intended, about to be recovered and given a place of honour in the house.

It’s made of quartersawn oak, the wood of choice for Arts and Crafts furniture. It is the drunken uncle to the furniture that I hope to build, not ‘quite’ in the style that it seems that it is supposed to be. But it’s made of the right stuff, it’s sturdy, and, most important of all, it’s terribly comfortable.

So with this new dedication to making ‘real’ furniture, I am realizing that some of the tools that I have are not sturdy enough to deal with the harder wood and the lower margin of error. A margin of error, I should add, that includes the extra special margin that comes from my general level of incompetence. That’s two errors. One error too many. So I’m upgrading. Step by step, I’m making myself a real, semi-serious, woodshop.

I’ve spent months wandering through discussion forums and trying to figure out the absolute basics I need to get started. Without further adieu, the five (okay, six) basic tools I need in order to build cool furniture:

1. The Table Saw
The table saw is the heart of any woodshop. It allows you to make the big cuts, straight. Straight seems to be the magic word in woodworking. I’m saving up for a cabinet saw.

2. The Jointer
This is a funny little tool. All it seems designed to do is make a board straight. Seems simple enough right? Don’t they come straight when you get them? Well… that depends. It seems all the cool people get wood unfinished from the lumber store. It costs a lot less and gives you a bit more control. The big choice in jointers seems to be 6” or 8”. The smaller one is much cheaper and will fit into my little shop. The 8 inch, however, allows you to make the edge of a board straight, but also the flat of it as well. If I had the space…

3. The Planer
The planer is a simple tool. Also called a ‘thickness planer,’ it allows you to get your board to the needed, uh, thickness. Simple, but absolutely necessary as – see above – not all boards are actually created equal.

4. The Mitre Saw
This makes very precise cuts across a board. I actually have one of these already, which is handy. It’s a ‘compound sliding mitre saw’, which essentially means that i can cut across a 10” board and do it on an angle. That’s cool.

5. The Band Saw
This saw is critical for any curved cuts you might want to make. Need to make a rounded swirl or a curvy bit? The band saw is perfect. It can also be useful if you’re trying to split a large board in half.

…And one extra tool, for good measure:

6. The Mortiser

This is only necessary if you’re interested in making Arts & Crafts furniture, like I am. But that stuff is gorgeous, and my life is going to be alot easier with one of these. Essentially it makes square holes for the pegs that join most Arts& Crafts pieces together. It’s a signature design element in that kind of furniture, and makes what you build solid as a rock. Sounds easy enough…but it’s a lot more complicated than it sounds unless you have one of these little beauties.

When looking for tools, I try to follow my father’s rule of thumb: buy it once. In other words, the cheapest version may not be your wisest investment.

But neither do you need to spend a fortune. In this age of irons and microwaves that only last a year, it seems that many of the tools created for woodworking are still made of sturdy stuff. In my research for the woodshop, I’ve come across any number of tools that seem to suggest they weigh over 500lbs. While delivery might make sense if you’re breaking out these big guns, the truth is, the majority of the tools on my list can be found gently used and still in excellent shape: check your local listings.

Basically: take your time gathering your woodshop necessities. Do your research, know what you want to build, and be careful to keep your fingers when learning! If you’re patient and lucky, you may be able to build a lifetime of tools and skills and great furniture for less than the investment in one single signature pre-built piece.

DIY Deco Chairs, or How to Spice Up a Snow Day with a Staple Gun

When I was a kid, I loved snow days.

Every school day, all winter long, I’d wake up and peer hopefully out the window, looking for that white blanket of respite from the regular. I liked school, but I liked snow days more.

Even when I taught school, I liked snow days.

But as a parent, they aren’t quite the same game.

I work at home. I have three jobs, one of which is actually me being a student myself. All of them involve writing deadlines and juggling multiple balls. My work never closes, more or less. So, meetings aside, I get to be home if the kids need to be.

But the writing and the parenting? They are dances in opposite directions. And days when everything’s on my plate at once often leave me feeling like nothing’s getting done well.

But not this week.

This week, we had a late-in-season snow day. Yep. No, this is not an April Fool’s Joke.

The kids had only been back from March Break a day, and I had a paper due, and the house was already a bit overrun with to-dos. The little people ran through the toys and the joy and glee of playing in the snow rather more quickly than their mother had in mind usual. By mid-afternoon, we’d drawn seven sea monsters and I’d written half an ethics review and the three-year-old was climbing up my leg and it became clear that none of us were going to make it through the rest of the day without either chemicals or Divine Intervention.

Then I found salvation in – of all things – a DIY project.

Seriously, people. You want to salvage a snow day and still feel the sweet swell of accomplishment at the end of it all? Buy yourself a staple gun.

Three months ago, just before we moved, I found an online seller with a set of four vintage chairs to unload. They charmed me. They’re old, and quirky, and have this fabulous Deco pattern painted on their scalloped backs.

Awesome chair, right?

But they came with cushions upholstered in a fuzzy beige velour. A worn, tired, 1983 sort of fuzzy beige velour. The kind that makes everything in the room feel fuzzy and worn and beige and 1983, and I don’t mean in a fun way.

So Tuesday, armed with staple gun and glue and drill and pliers and some crayons just to keep things interesting for the younger set, we took the seats off those chairs and recovered them.

Step 1: Use drill to remove seats from chairs. Do not actually let three year old use drill. Distract her by asking if she can draw the design on the chairs instead. Be shocked when she indeed can.

Step 2: Go hunting for the gorgeous fabric you ordered from Tonic Living last week. Find it being pressed into service as a ghost costume by the almost-six year old. Boo. With flowers.

Step 3: Turn over existing cushion on top of fabric and notice that previous upholstery efforts were just as much a hack job as yours is likely to be. Feel better. Fold fabric to size and cut.

Step 4: Carefully stretch and fold fabric around existing cushion, as it may look like 1983 but it’s actually kinda cushy. For corners, aim for a tight series of small folds all moving in a single direction. Tack down with staples. Notice staples do not go into hardwood especially smoothly. Swear. Catch yourself. Try to avoid stapling nose of curious elder child.

Step 5: Repeat for all four chairs, enlisting offspring to help you hold fabric taut whilst cutting and to place pretty new cushions back on chairs. Have domestic partner actually tighten and glue joints on chairs, where necessary. Drill cushions in. Admire.

There you go, people. In the end, you get four handsome chairs and children who got to feel like part of the process, more or less. It’s a snow day miracle! Just avoid stapling all skin surfaces and you’ll be fine!

Have fun. And hang tight…snow season has to be gone soon, right.?


The Problem with Pirate Treasure: Should Party Presents Be Money?

At our house, there’s a birthday coming down the pipe. For months now, the birthday-boy-to-be has been telling everyone that he’s five-and-three-quarters (!!).

You know what this means. The Birthday Party Planning Machine is speeding ahead full throttle.


Photo courtesy of Calsidyrose


You want to get a whole roomful of parents worked up and foaming at the mouth? Talk birthday parties.

Gone, it seems, are the jolly old days when eight kids got thrown in a basement rec room with boiled hot dogs and three balloons, and LIKED it. Pity.

Today, birthday parties are a political minefield of choices about inclusion and consumerism and identity and obligation. And they get pricey fast. Not to mention require the organizational skills of an event-planning ninja.

Birthday parties are an industry now: with rented venues and entertainment and activities for hire. They have themes, and de rigeur loot bags, and in the elementary-school years there’s a trend toward huge gaggles of children converging on the chosen space. Expecting Fun with a capital F.

Yeh. As a mother, the whole prospect gives me a bit of a capital F, myself. Ahem.

In other words, they give me hives.

But, let’s face it, birthday parties are not about me. They’re about the kids.

And my kid? His enthusiasm about his birthday party is a beautiful thing. So I suck it up and muddle through playing the part of Birthday Party Planning Machine every year. I even – kinda – like it. Because his excitement is catching and his delight palpable.

He’d like a pirate theme. He’d like a pinata. Can do, kiddo.

He’d like a skull & crossbones cake. I’m thinking this one: I used fondant for the first time for my daughter’s third birthday last fall and the result was relatively cute and civilized.


Photo courtesy of Meringue Bakeshop

He’d like to have the shindig at our house, because our new place has a huge backyard, and so I am petitioning all the gods for decent mid-April weather and calling that easy-peasy. And cheap. Pirates don’t mind a bit of mud, after all, right? Especially if they’re hunting for treasure?

Dandy.

He’d also like to invite his whole kindergarten class.

Gulp.

Sure, it’s a grand idea. Nobody gets left out, which suits the messages we’re trying to impart at this age.

But fifteen tiny pirates means a whole lotta loot.

My children usually get one big present from us for their birthdays. They also have three sets of generous grandparents, plus aunts and uncles and family friends who tend to send something their way. They’re lucky.

Even if they never had a single birthday party, they’d be rolling in about ten brand new toys every time the calendar turned. That’s a lot of new stuff. A lot of packaging. A lot of wrapping paper in the wastebin. And a lot of sensory overload: even Mr. Five-and-three-quarters (!!) got overwhelmed after about Present Number Eight last Christmas.

Add in fifteen extra party toys on top of that and you’ve got a lot of excess on every front, in a life where we’re ostensibly trying to minimize excess.

What’s a Birthday Party Planning Machine to do?

Last week, a post on money guru Gail Vaz Oxlade’s site raised the issue of birthday invitations that come with a link to a site where you both RSVP and offer a credit card donation, part of which goes to charity and part to fund a present of the child’s choice.

The response in the comments was varied, but the level of vitriol took me by surprise. Some people are straight-up Capital O Offended by the idea.

And me, I’m puzzled.

I get not wanting to be asked for your credit card, sure. There’s something about it that reeks of transaction rather than relationships.

But.

Let’s be honest. The presents part of parties is a more or less obligatory form of social grooming anyway. The present stands in as a symbol of the giver’s fondness for the recipient. The origins of the practice go WAAAAY back to a time when the gifts – which were usually handmade, practical, and often consumable – served to offset some of the expense and burden of actually throwing the shindig. It’s a social practice based in scarcity.

So in a world grappling with excess, does more excess do anything to actually foster the sort of equitable redistribution that gift-giving once served? Or is it possible to redirect some of the excess to places in society where scarcity is still a very real challenge?

And is that offensive? What do you think? If gifts are a symbolic exchange, does openly converting them to the vulgarity of money make you uncomfortable?

Last spring, we attended the party of a five-year-old friend who asked for donations to the local Humane Society instead of gifts. We gave her a card and a ten-dollar bill. I didn’t need to run around town for a gift, or worry that she already had whatever we chose, or fret over whether Plastic Toy A really properly represented this little girl and our feelings for her. A card. A picture inside, drawn specifically for her. And ten bucks to go towards the cats and dogs she happens to adore.

I didn’t think it was offensive. I thought it was awesome. And so did my young pirate.

Until I read the post, we had thought we might go this route.

A treasure box at the door to collect (small) donations of coins, if people were willing to play along. No credit cards. The kids could help scoop and tally them up at the end, and we’d make sure both kids and parents knew where the gifts were going.  A picture of all the little pirates would accompany the donation. Chocolate coins for take-home loot bags, for my kids and all the guests. And the birthday boy’d still get to rip open his pile of family gifts when the festivities were all over.

Now I’m not sure. The Birthday Party Planning Machine has ground to an uncertain halt. I don’t want to offend people, seriously. I just want the kids to have fun and my birthday party hives to go away.

AAARGH, mateys.

What do you think we should do?

How would you word the invitation to cause the least kerfuffle? And would you ever consider asking for donations instead of presents? Why or why not?